Many people like to get a head start on their growing season. You can do that by starting your plants indoors when the weather is still too chilly outside, or the seeds could be tiny and need to be exposed to light to germinate. Tiny seeds can blow away and dry out too quickly to germinate. Many wildflowers and plants like begonias have seeds that look almost like dust, so they require a specific environment to sprout.
- Gather your supplies and tools. Maybe you have a tray with peat cells or a cleaned and sterilized food container, but you need an appropriate vessel that has enough depth for roots to grow, and a way to drain the moisture from watering. Of course, you need seeds, planting medium, some form of lighting, and a place to take advantage of the light such as a plant stand, or some object you can use to rest your seed container. Below is an example of a seed tray containing seed starting medium placed under LED lights.
- Dampen your seedling medium with water. I put the soil in a large bowl and pour water in and mix it until the water is absorbed. Then I place it in the cells of the tray and gently compress it and add a little more of the soil on top. Then plant the seeds according to packet directions as far as depth to plant, and if light is needed for germination. I consult the package of seeds to determine if bottom warmth is needed, place the heating mat beneath the tray, and place both in the predetermined place for proper lighting. I leave 1 cell, in this instance, without seeds or soil so that I may bottom water. Then I will place the plastic dome that comes with this tray to keep it humid until the sprouts appear. See bottom photo on this page. You can also tent plastic wrap over a container as long as it doesn’t touch the seed medium.

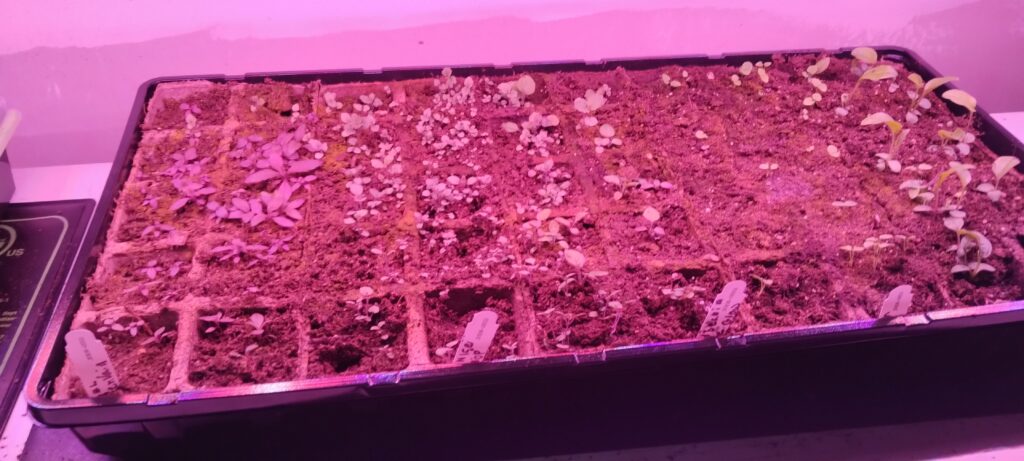
The second photo shows a heat mat that is helpful for starting many seeds that require a warm environment to germinate. The top photo shows sprouting seeds of 5 different varieties. You can use the top of a refrigerator to provide the necessary heat, but you will need to move them into the light as soon as they sprout. The light source is LED lights thus the pinkish cast. I have found this type of light to be excellent in helping the seeds germinate, although you can use fluorescent bulbs in a shop light fixture or a bright window. You must make sure your baby seedlings do not dry out or become over-watered. Drying out too much will kill them and over watering will encourage “damping off” which is a disease where they topple over and die. I have found bottom watering works the best for me. The top of the soil can be slightly dry and the bottom should be damp, but not waterlogged.
- Once you have done these steps, you are almost done with the planting process. Now comes the waiting. After a few days, you should check your setup to see if anything is poking through the soil yet. When you see green, you should remove the plastic cover. It is necessary to keep your tray damp as not all seeds will come up at once. I recommend bottom watering. With a tray like this, it is easy if you leave 1 cell open, and you can just pour the water into that cell. If you see green algae growing on top you are overwatering. You can check for damp by inserting your small finger up to the first joint into the growing medium to determine if your plants need more water. If you use a food container, be sure you have a few holes in the bottom for drainage and set it in a waterproof saucer. You may feed your plants a little fertilizer at half strength as they get larger. You can turn off your heat mat when your seeds have sprouted. Continue until it is warm enough in your area for planting outside (usually after danger of frost is over), and the follow the process for hardening off.
You can find plant stands and lighting in the garden section of your local stores, or for more selection, check out seed companies such as Park Seed, Burpees, Jung Seed, Gurneys or places like Amazon. Some of the double-decker ones can be in the hundreds of dollars, and are great for convenience. You can also build your own. You can make it as small or as large as you like. For a modest investment, some local lumber from the big box store or your local lumber company, you can build a light set up like this with basic tools that will give you a lot of space to start plants. I started over 300 plants last year on the one I had built over 30 years ago, and start my plants in my basement until the weather warms up. The following photo is of my light setup.
